
Perhaps you have a great idea for a Sokoban game in Puzzlescript, but it involves checkpoints. You want the player to be able to reset to the checkpoint if they die. How do you do that? This tutorial will cover it, and it’s very simple. It was an idea I experimented with in Puzzledorf but didn’t end up suiting that game, but checkpoints have their uses. This tutorial builds on knowledge from my previous tutorials in Puzzle Script.

Creating Checkpoints
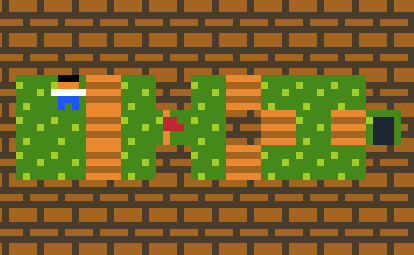
Use this sample project to follow the tutorial. Once you have it open, we need to program the checkpoint. It’s as simple as this line of code:
late [ Player FlagRed ] -> CHECKPOINT
FlagRed is the checkpoint. When the player is on top of the flag, this code creates a CHECKPOINT. If you do not use ‘late’, the checkpoint feature will not work.
Test your game. Walk over the checkpoint, then walk a bit further, then press ‘R’ . You should restart to the checkpoint.
Multiple Checkpoints
When there are multiple checkpoints, the game uses the last checkpoint the player activated.
To avoid reactivating a checkpoint that’s been used, change the checkpoint into a different object. To do this, create a white version of the red flag in the OBJECTS section of the code, under the red flag.
FlagWhite
White Orange
.1...
.00..
.000.
.1...
.1...
Now rewrite this line in the legend:
Flag = FlagRed or FlagWhite
We can name a group of objects. In this case, ‘Flag’ is either the FlagRed or FlagWhite. So long as one of the grouped objects is assigned a symbol (we assigned FlagRed to ‘F’), then you don’t need to assign symbols the other group objects – but if you don’t, you can’t access them in the level editor, only in code. You can then assign the group to collision layers, which has been done. Referring to a group of objects, like ‘Flag’, refers to the entire group. So:
[ > Player | Flag ] -> [ > Player | ]
Would affect either a red or white flag.
Changing the Flag Object
This is how you change FlagRed to FlagWhite:
late [ Player FlagRed ] -> [ Player FlagWhite ]
At the end of the turn, if the player is on a red flag, make it a white flag. Make sure, however, that you change the flag graphic after you create the checkpoint, because code is read top to bottom. Test it.
Changing A Second Flag
The project has two flags. When you activate the second flag, let’s make the old white flag turn black so it can’t be used again. Write this:
late [ Player FlagRed ][ FlagWhite] -> [ Player FlagRed ][FlagBlack]
What the code says is, if the player is on a red flag, and there are white flags anywhere in the game, make the white flags black. Now, due to code being read top to bottom, we have to do it in the following order:
late [ Player FlagRed ] -> CHECKPOINT
late [ Player FlagRed ][ FlagWhite] -> [ Player FlagRed ][FlagBlack]
late [ Player FlagRed ] -> [ Player FlagWhite ]
If you’re not sure why the code has to be in that order, experiment changing the order of code and test. You need to learn to step back and think through what code is doing to solve problems on your own. I’ll give you a hint though – when you’re playing, where are the red flags during the last line of code in the following incorrect sample?
[ > Player | Crate ] -> [ > Player | > Crate ]
[ > Crate | Flag ] -> [ Crate | Flag ]
late [ Player FlagRed ] -> CHECKPOINT
late [ Player FlagRed ] -> [ Player FlagWhite ]
late [ Player FlagRed ][ FlagWhite] -> [ Player FlagRed ][FlagBlack]
Conclusion
You can view the finished sample project here. I’ve also just shown you the basic animation techniques. In the next tutorial, I will teach you how to do some more advanced animation techniques like explosions for your Sokoban games.
Next Tutorial >
If you liked this article, please check out Puzzledorf to show your support. If you enjoy playing, leaving a review helps the games visibility on Steam.


Leave a comment